
DIY: Squid Game Pink Soldier Mask and Costume, jerry-rigged
Quick links
For Halloween this year, the Ontario government is recommending that masks be worn by both kids and adults handing out candy. And not just a costume mask - a proper, public-health-sanctioned mask. 😷
Why not do them one better and show up gloved, and in a full Mylar hazmat suit? The Squid Game Pink Soldier costume can do double duty this Halloween, as both PPE and cultural moment.
Costumes of various quality have been cropping up on Amazon, as one would expect. Serious costumers will want to grab a 3D printed version of the mask or make one themselves - there are some files on Thingiverse, if you own a reliable 3D printer, though the comments show that they all need some work because you can’t quite see through them. You could also get a fencing mask for $80 - $100 and paint the front.
However, if you’re like me and you’re loathe to spend money on a crappy costume that will get tossed in the trash, but also don’t have time to go the full nine yards (read: my 3D printer is in need of some repairs), here’s how I jerry-rigged a passable version of the Squid Game pink solider costume using either stuff that I had lying around the house, or a purchased item that can do double duty in other normal life uses. Read on.
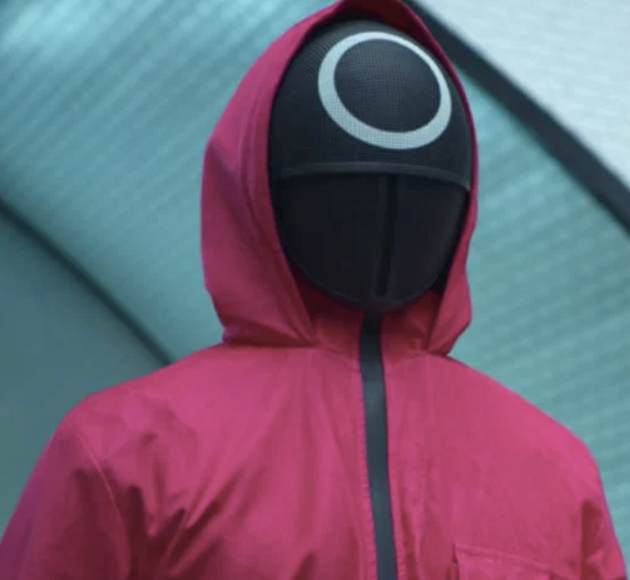
Are the jumpsuits red or pink?!
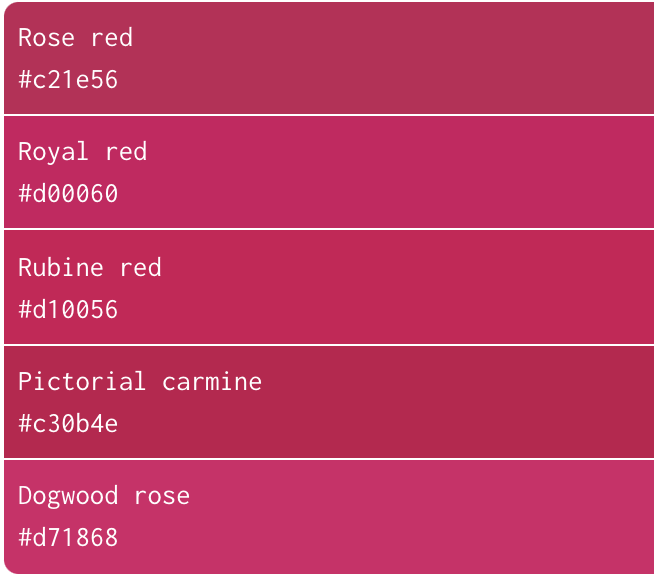
Apparently there is a raging debate over whether the jumpsuits are pink or red. I’m convinced that they are a rose-magenta of sorts, for two reasons:
- Magenta would be a complement on the colour wheel to the teal blue-green of the player tracksuits, acting as visual reinforcement of the opposition between the pink workers and the players. The complement to red would be more of a Christmas-tree green. In a show that pays so much attention to aesthetics, it’s hard to imagine that this colour contrast wouldn’t be deliberate.
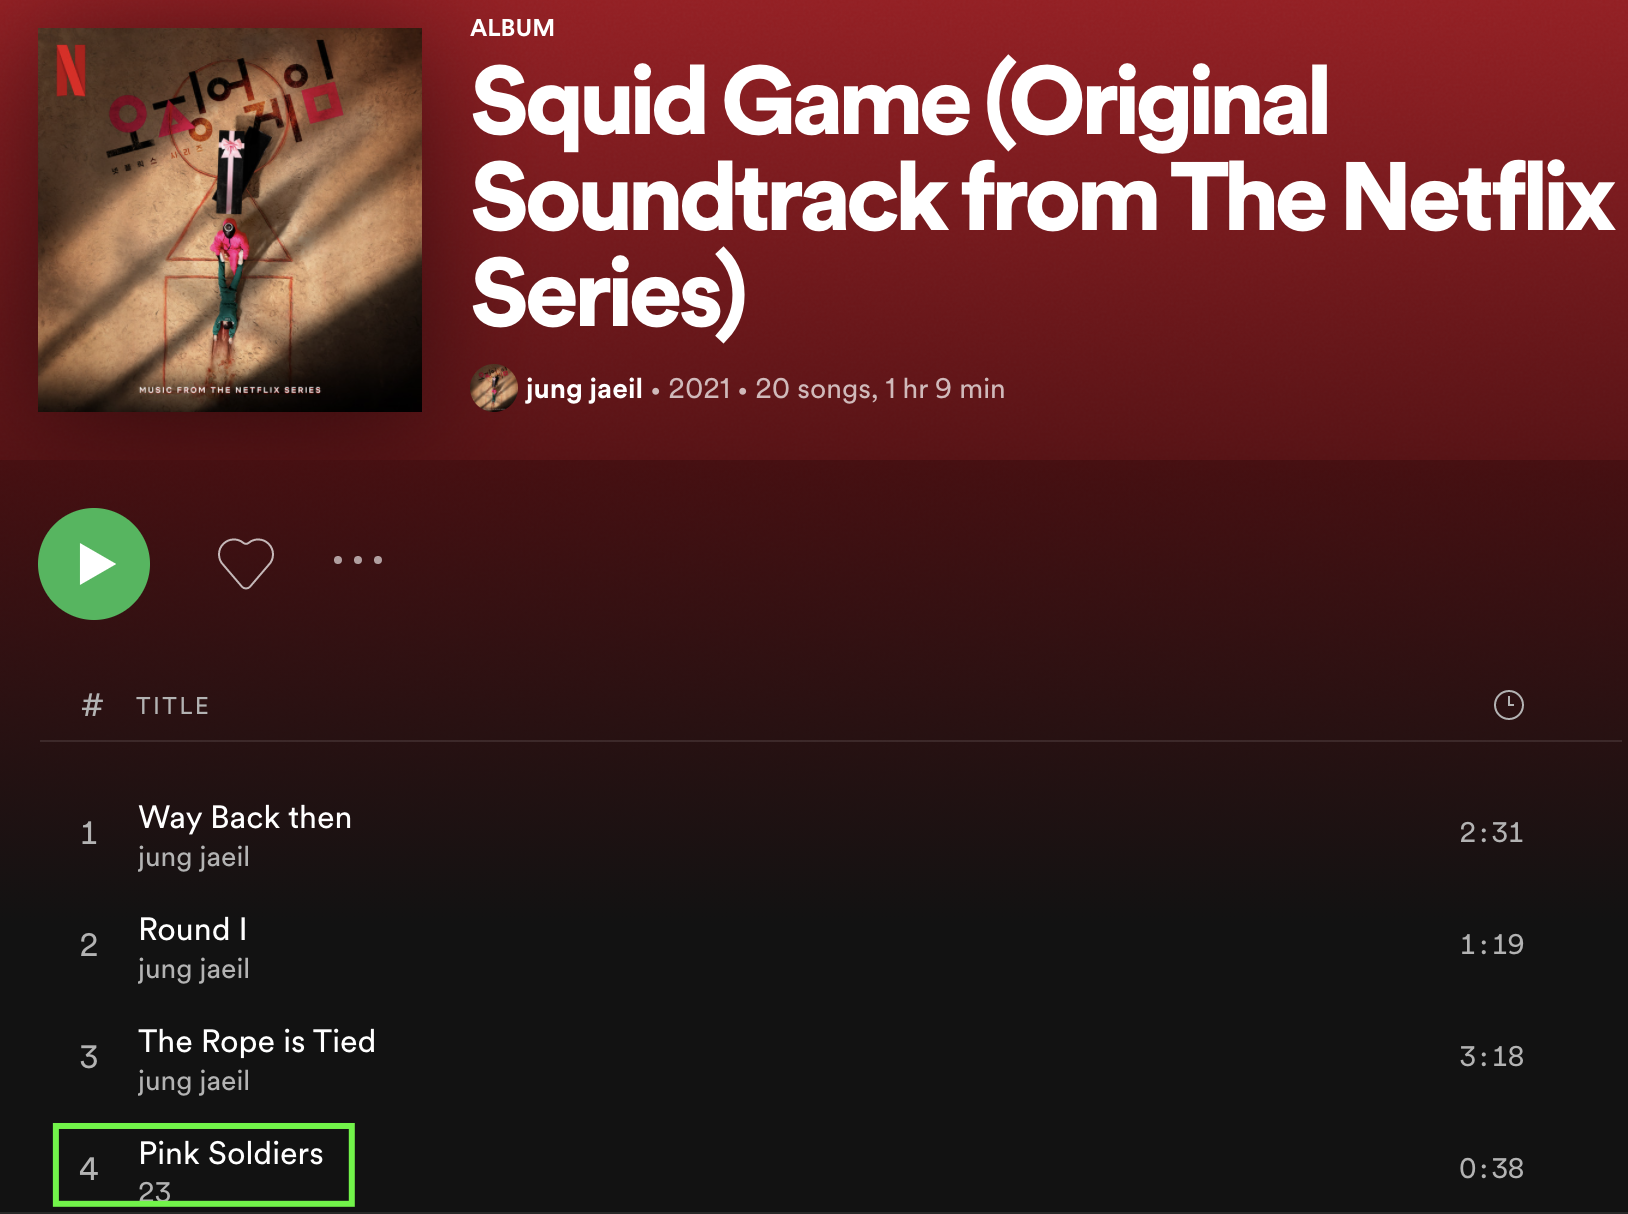
- The official soundtrack has a song called “Pink Soldiers”… 😛
Materials
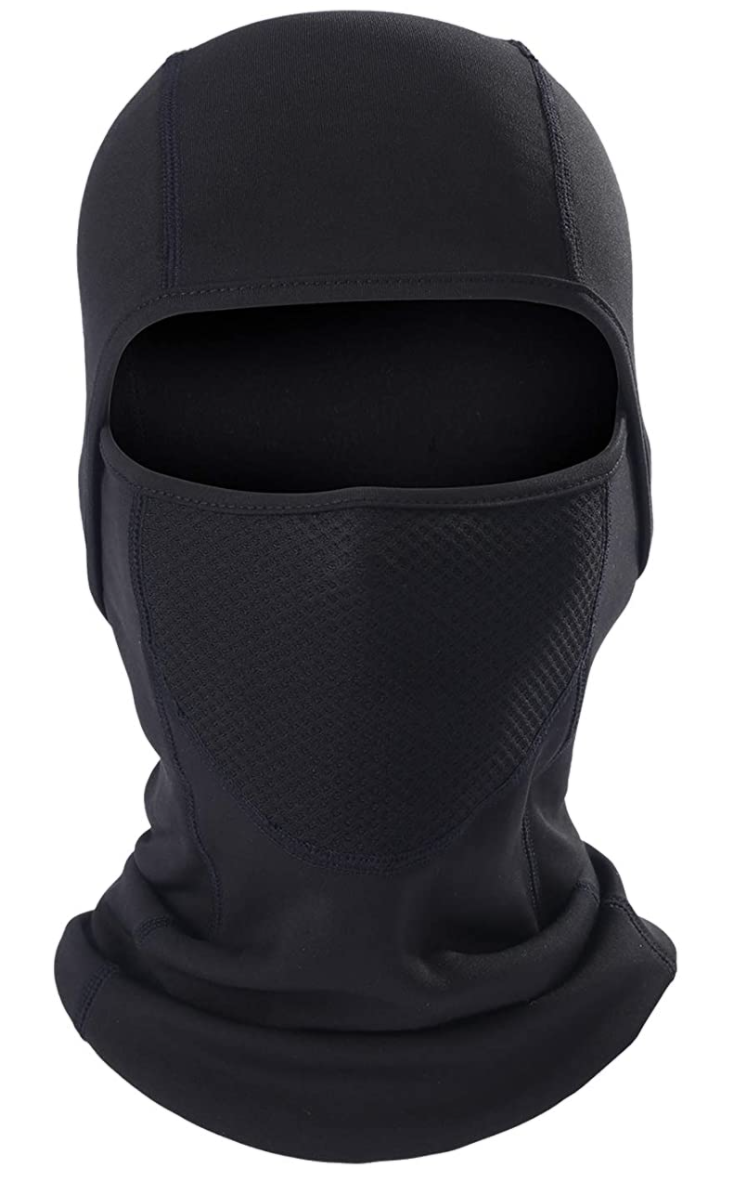
Mask:
- 1 black ski mask, ideally with a mesh mouth covering. Alternatively, just a black surgical earloop mask - the type that has become common in COVID times.
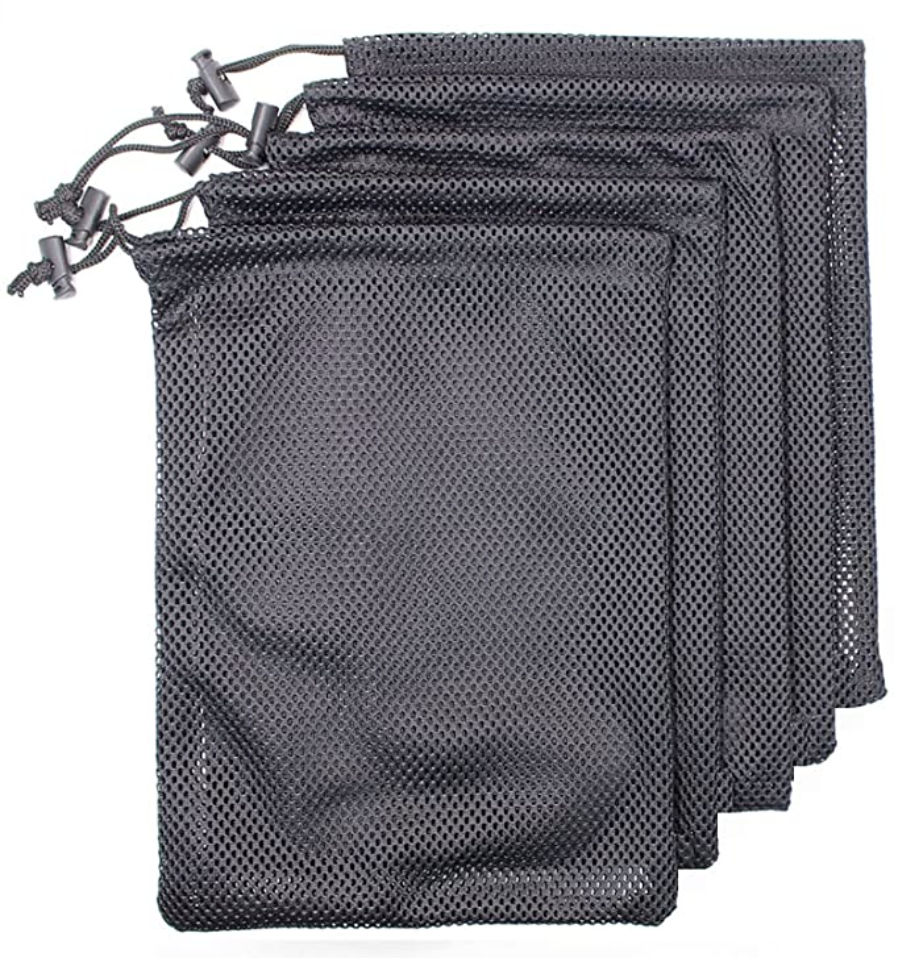
- A black mesh bag, big enough to pull over your head, with holes large enough to see through. This will be our “mock” version of the top part of the mask. It won’t look very pretty, but it’s covered by the hood!
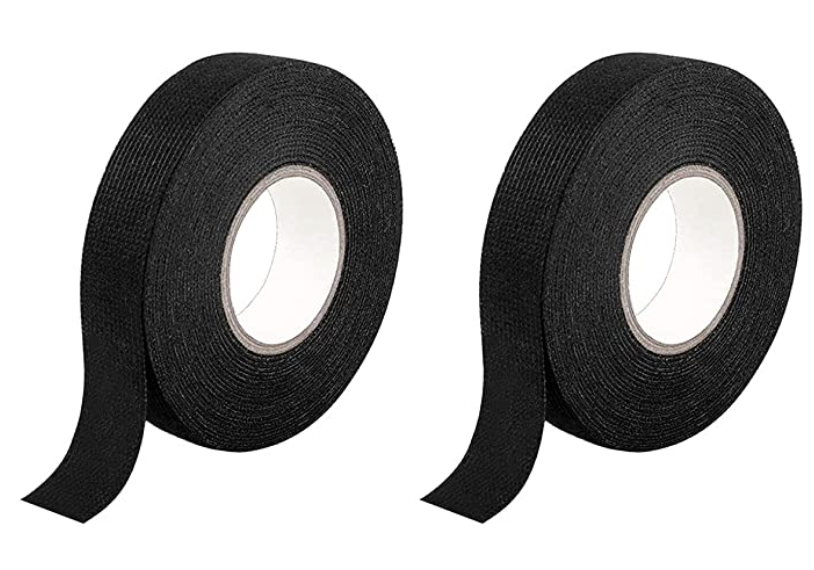
- Black harness tape / gaffers tape / fabric wire wrap (for the mask trim). Fabric-like texture is best, but electrical tape will do in a pinch.
- I do have a Cricut, so I’ll be making my white iron-on shape out of white HTV (heat transfer vinyl).
- In a pinch, I’d use white paint / whiteout and a stencil to make the shape.
Rest of costume:
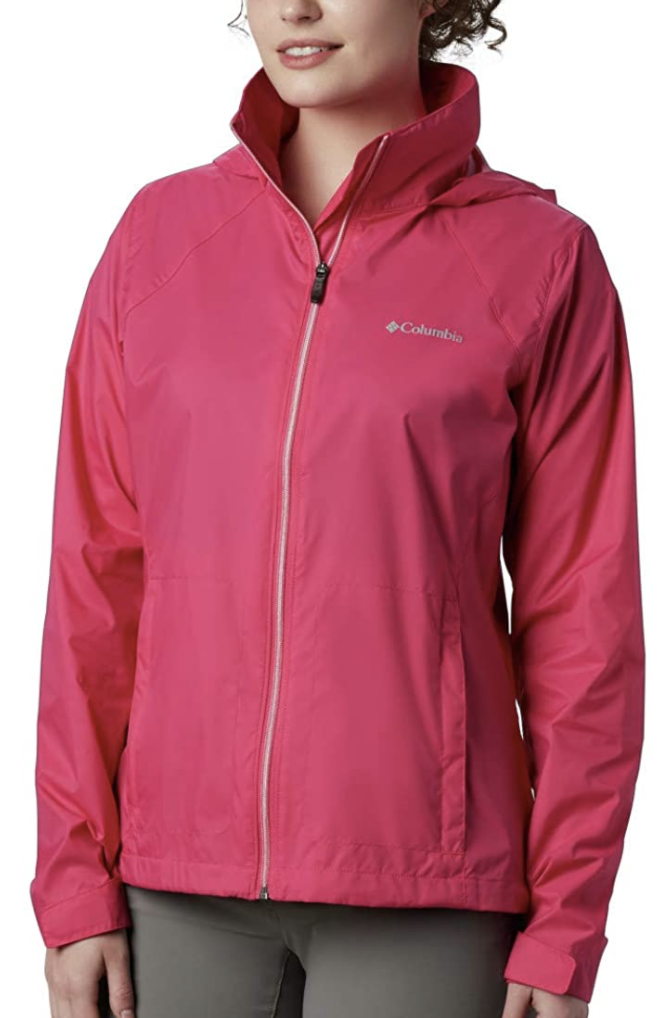
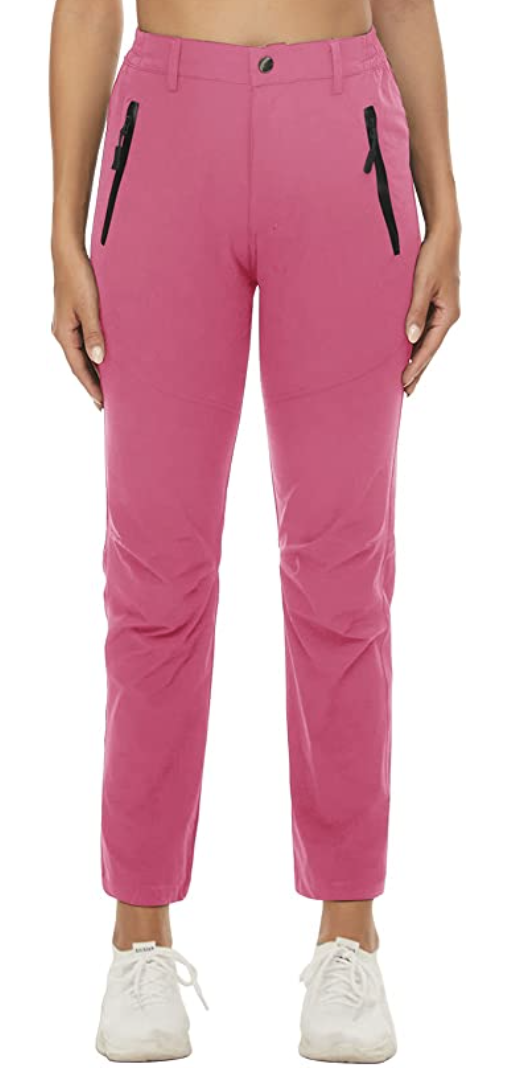
- Reddish/pink rain coat with a zipper - if the zipper isn’t black, you can line the sides with strips of black fabric tape. Then find somewhat color-matched pants with belt loops. You’ll tuck the jacket into the pants and then cover the join with a belt.
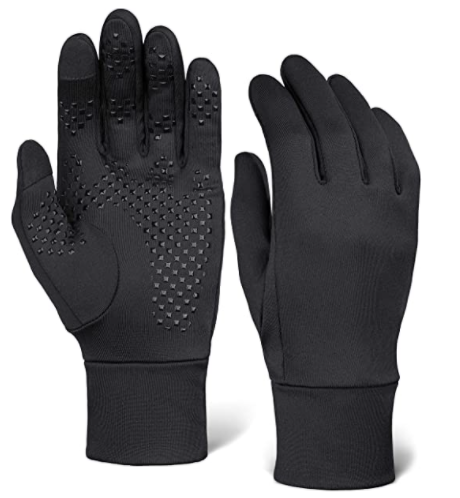
- Black gloves. I used my running gloves, latex ones will also do.
- Black / dark boots or shoes
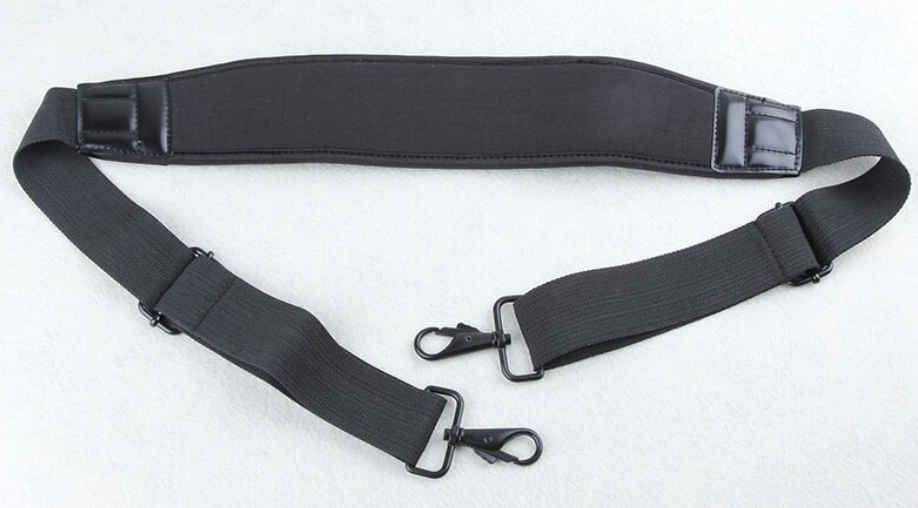
- A belt: I took the strap off my old camera bag and clipped the hooks into each other. Look on duffle bags, backpacks etc.
(BTW, there are no affiliate links in this post - I think they compromise the integrity of how-to blogs. I’m just including links to what I bought myself. If you find this post helpful and want to say thanks, you can pick up the digital files for the white face shapes on Gumroad or Etsy!
Before you cut…
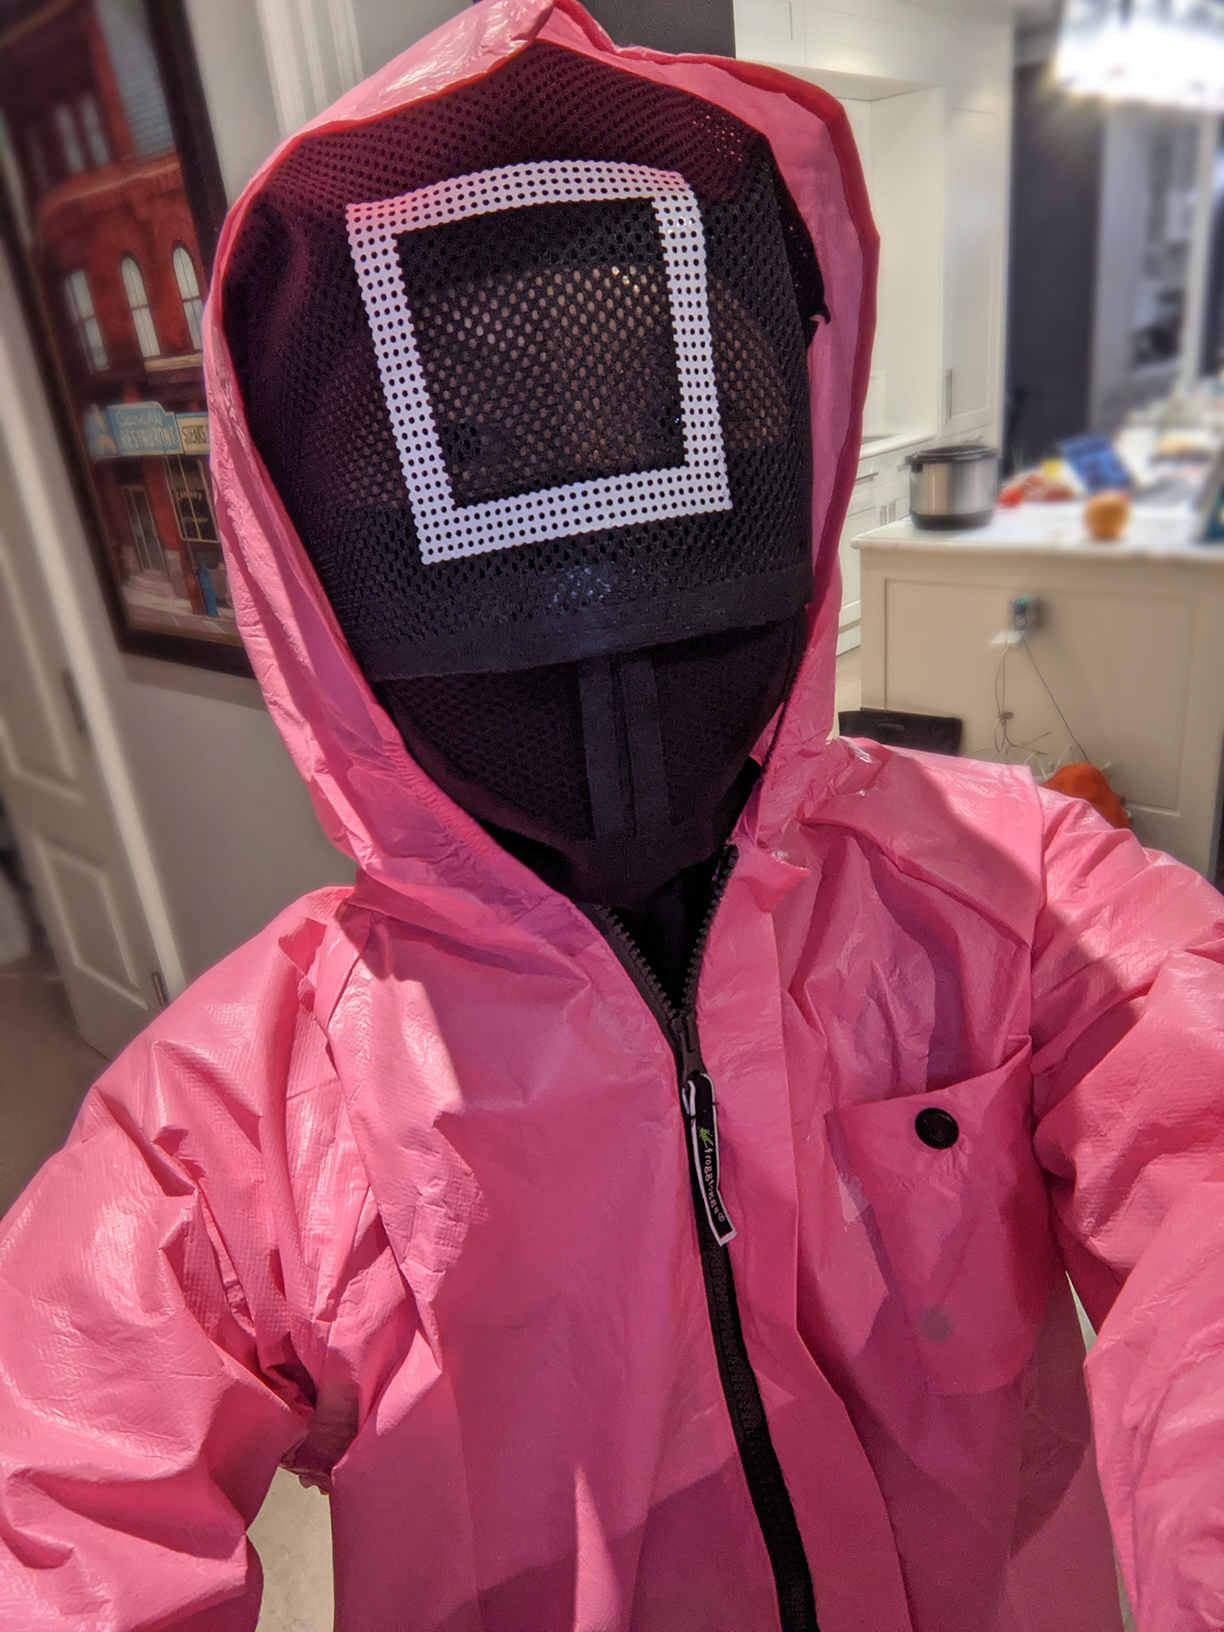
Place the mesh bag over your face, pull it up to the right height above your nose, and tape down any excess. (You may want to add a few stitches later to hold it in place if your tape isn’t very strong). None of this will look very pretty, but your raincoat hood will cover the mess at the top and back of your head, so just make sure the front looks good.
Mark the rough outline of the ideal size and placement for the white shape. (I did this using clear tape). Then measure to determine how big to cut your vinyl. You can mock up with paper or chalk at this point if you’re not sure.
I also “trimmed” the bottom edge of the bag with a strip of fabric tape to emulate the edge of the mask.
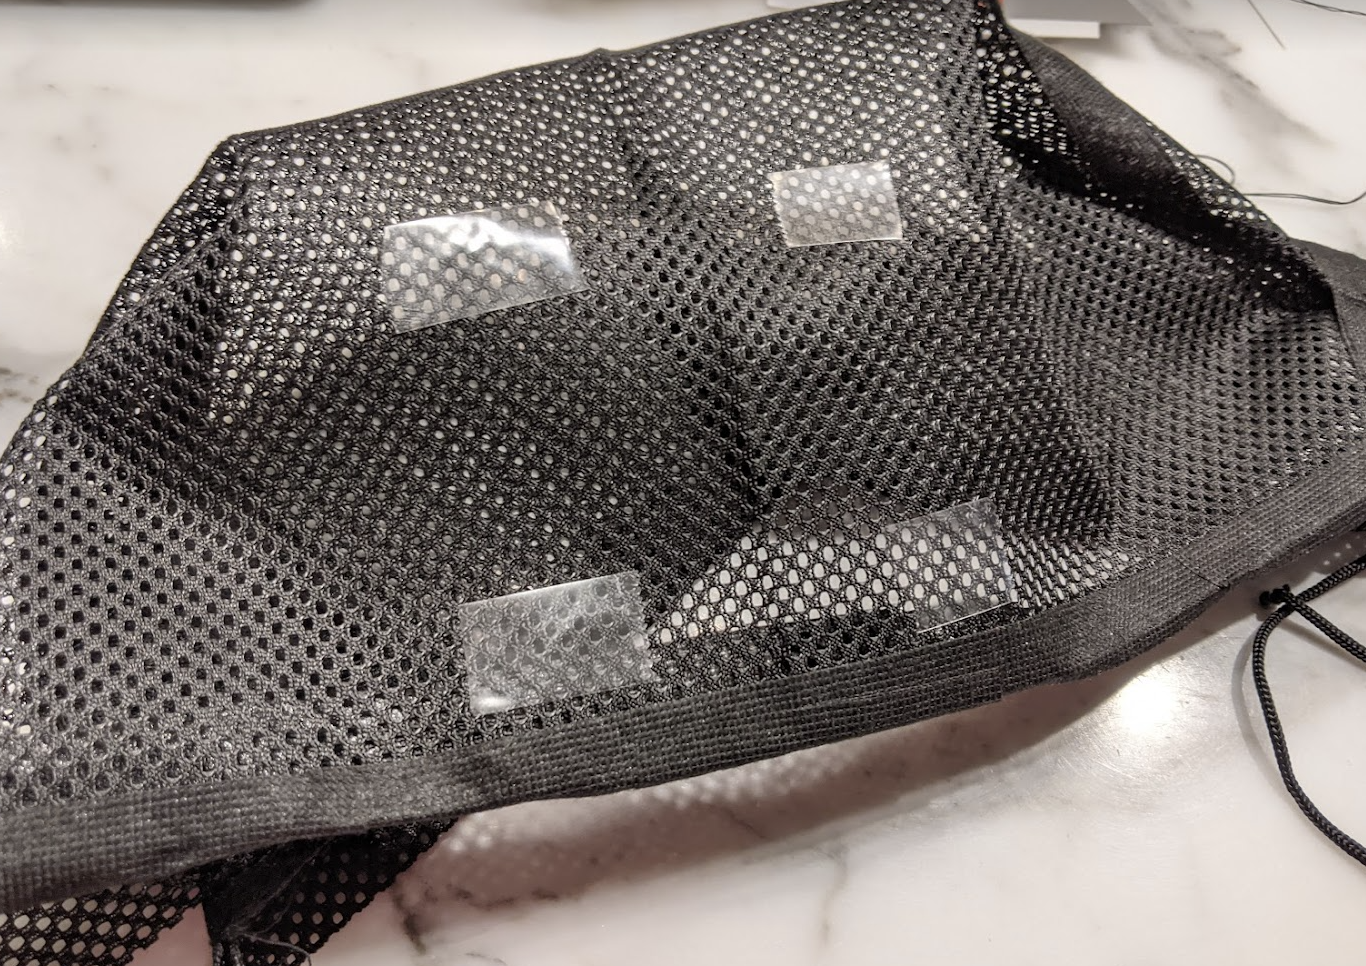
In my case the bags that I purchased were actually too small to fit over my head, so I cut one open and wrapped it around my head using fabric tape until I was roughly happy with the shape. I then added a few stitches to ensure the shape would hold, and re-sewed the drawstrings to positions that would allow me to tie this around my head.
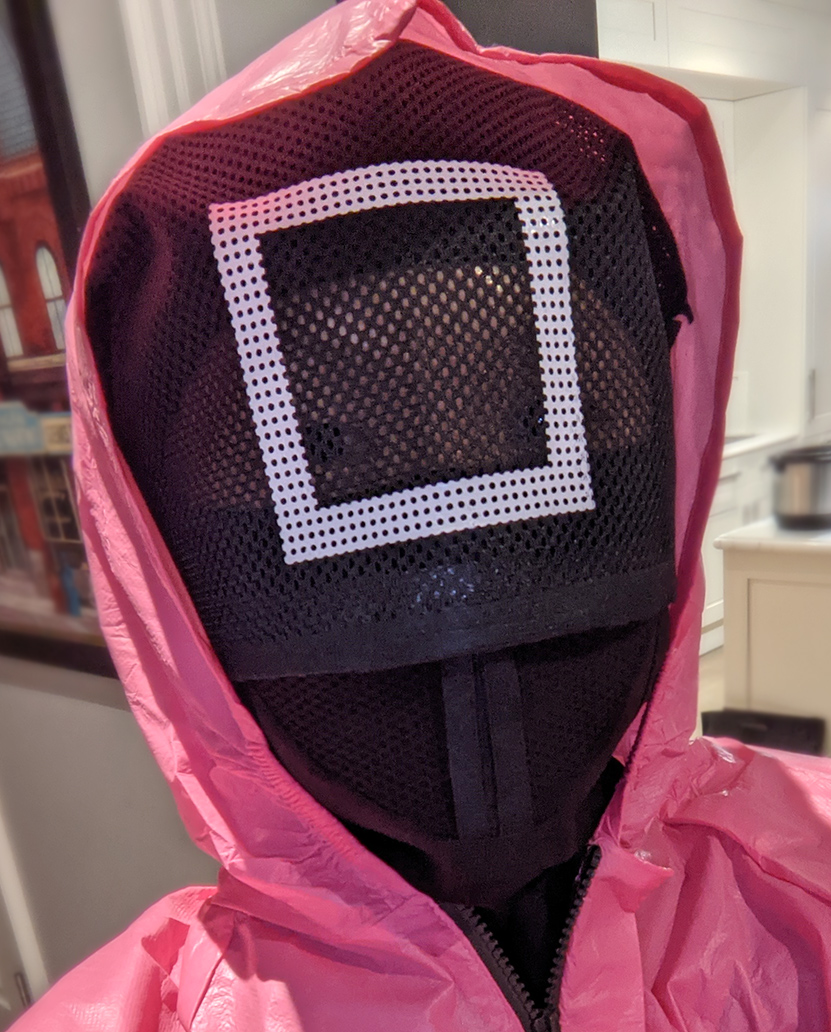
Dot texture on the face symbol
A quick hack to emulate the texture of the face mask is to add a mesh of little holes into your shape of choice before cutting and ironing it. It also conveniently prevents the vinyl shape from blocking your field of vision once you iron it onto the mesh bag.
I did this as follows:
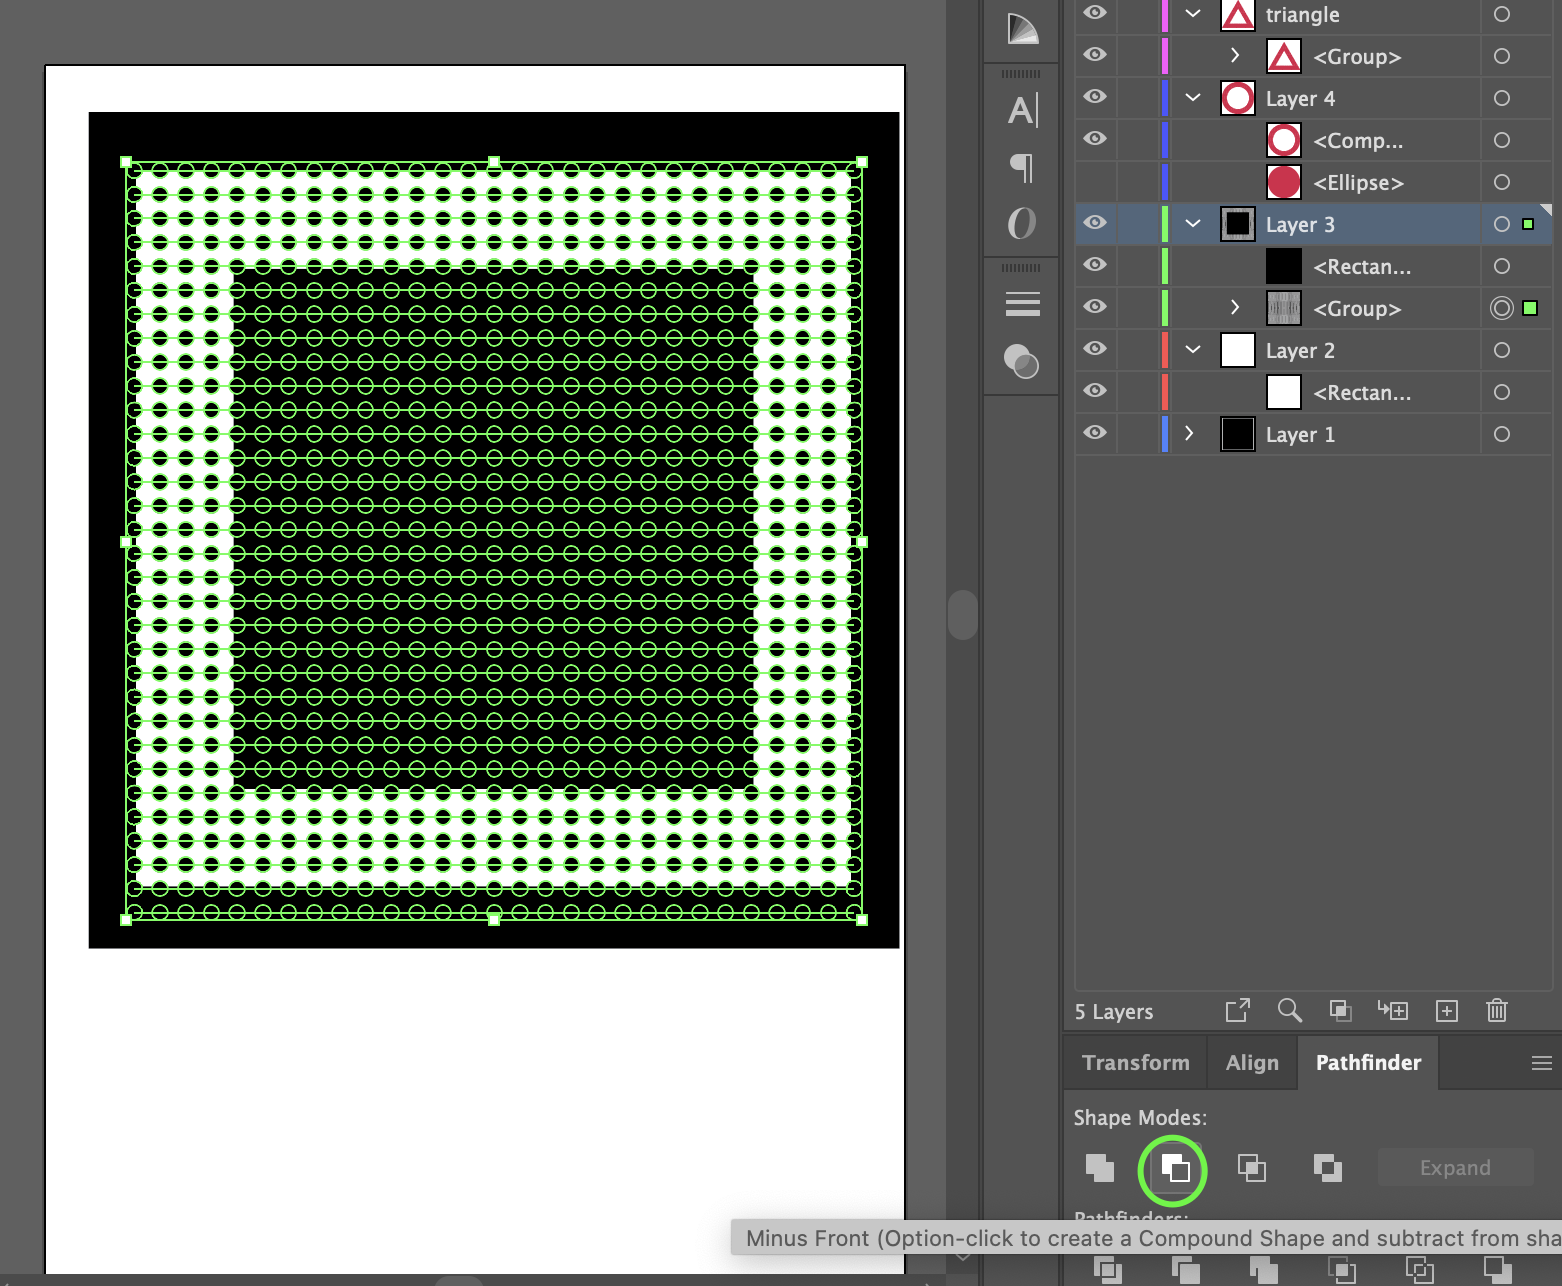
1) Construct your shape of choice in Illustrator, using Pathfinder > Minus Front. (I went for the square middle management look, what can I say 🙃)
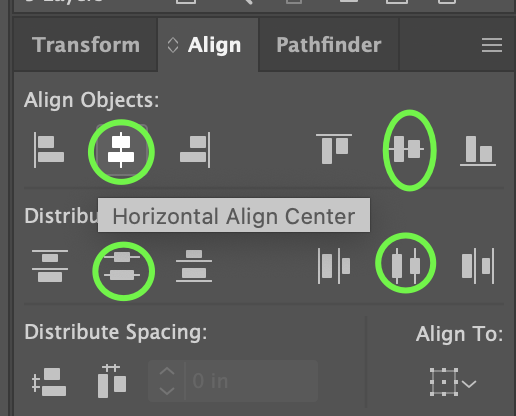
2) Create a grid of dots over top using the Stroke tool and Dashed Line settings. Use the Align tools to distribute your dots evenly in the vertical and horizontal directions. Then select all the lines in your grid and unite them all into a single object: Pathfinder > Unite, and then Object > Path > Outline Stroke.
3) Line the dots up nicely in relation to your shape, and then subtract these dots from your underlying shape using Pathfinder > Minus Front. Result:
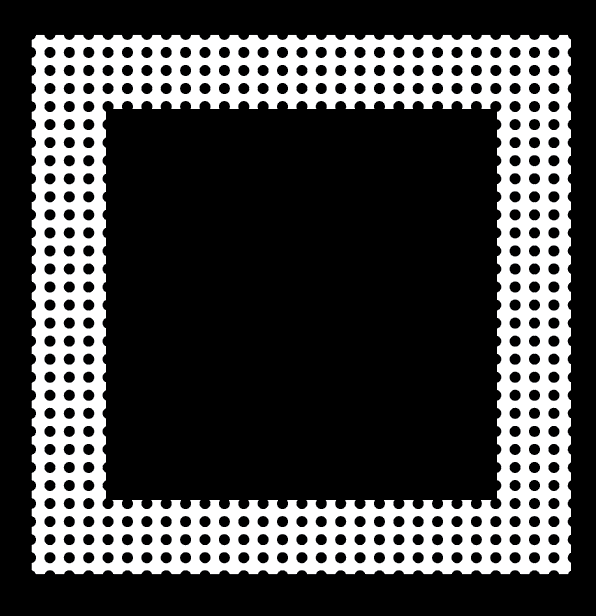
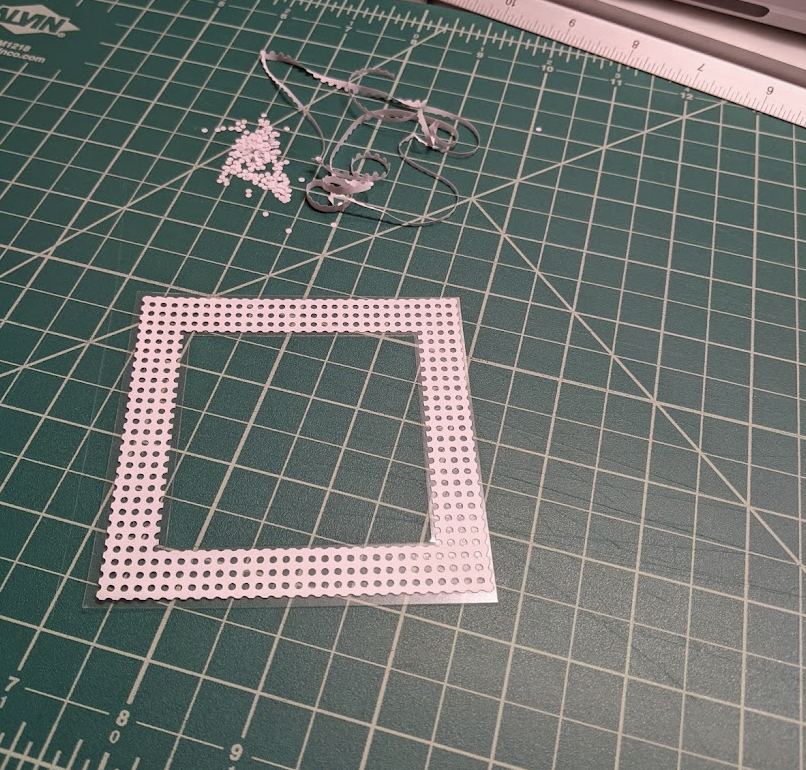
I used my vinyl cutter in order to ensure the shape would look sharp and clean. If you’re simply painting onto your mask, then you can skip these steps in Illustrator. I do recommend using a stencil instead of free-handing it, to keep your shape looking neat.
For those who are using a Cricut:
- Lowest pressure (70), less than usual, double cut
- Iron on highest heat with parchment paper on top, wait until completely cool before peeling.
And yes…this was a huge pain to weed…but worth it for the visual effect:

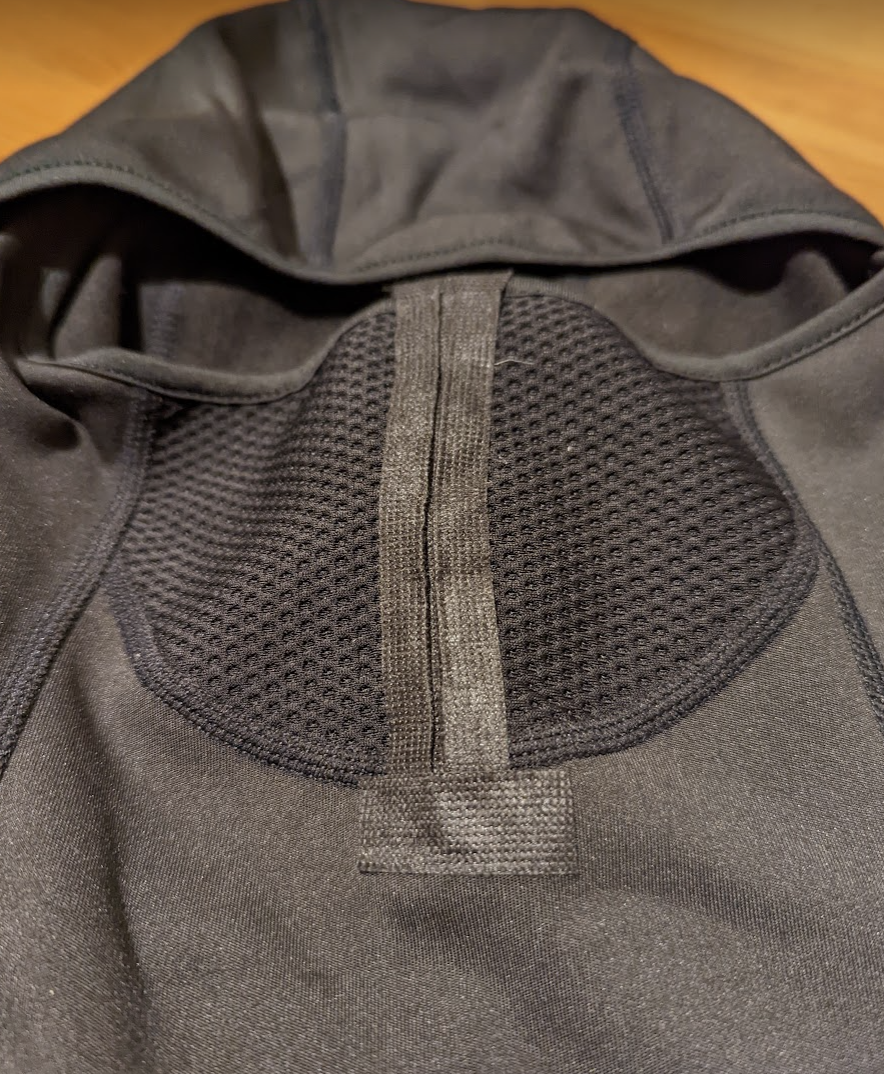
Mouth “lines”
Given my mask had a mesh mouthpiece, emulating the mouth lines on the mask was actually pretty simple: I folded two pieces of harness tape to half-width and stuck them to the mouthpiece. My particular tape wasn’t very sticky so I added a few stiches at the top and bottom to keep everything in place - but literally just a few, so that it would be easy to restore this to a normal ski mask later.
…and voila!
All ready for terrifying some kids safely handing out some candy this Halloween. 😷
P.S. if you found this helpful and want to say thanks and/or don’t want to do the Illustrator work yourself, you can pick up the digital files on Etsy or Gumroad! :)